Tuesday, December 2, 2014

Cloudy Day Tomato Soup

It's hard to believe just two days ago I was wearing shorts. Today it's 42 degrees and I'm freezing my buns off. I'll say this: Texas winters are never boring. 

We'll be back in the 70's by Thursday, so I'm not complaining. Sometimes I think it gets cold in Texas just so we can all have an excuse to pull out our favorite sweater, make some soup, and reminisce about summer (i.e. complain about winter).

Yes, summer. Remember those great tomatoes? I do. 


Back in June, when I was inundated with tomatoes and too busy to do anything with them, I washed a batch and stuffed them into a one gallon freezer bag. Simple as that. Other than washing them, I didn't process them in any way. This is what they looked like today when I pulled them out of the freezer and let them defrost a bit. 


I let them rest in a colander, while I started working on making some homemade tomato soup. I don't want the tomatoes to fully thaw, because I think they are easier to work with when they are still mostly frozen. 


Today I'm following this recipe: http://www.myrecipes.com/recipe/melanies-garden-tomato-soup 

I use the word "following" loosely, because I rarely follow recipes. Like many cooks, I improvise based on the ingredients I have on hand or what I'm in the mood for. Here's my ingredients list for today's soup:

Ingredients

2 generous splashes of olive oil
1 large onion, chopped
1 tsp dried oregano
1/4 tsp dried thyme
1/4 tsp dried basil
3 garlic cloves, minced
9 frozen tomatoes, various sizes
6 oz tomato paste
6 oz water
2 tsp sugar
1/2 tsp salt
1/4 tsp pepper
1/2 cup heavy cream

I combined the olive oil, onions, garlic and herbs and cooked until the onions and garlic were softened. Funny how so many good recipes start with olive oil, onions and garlic! I feel warmer already.


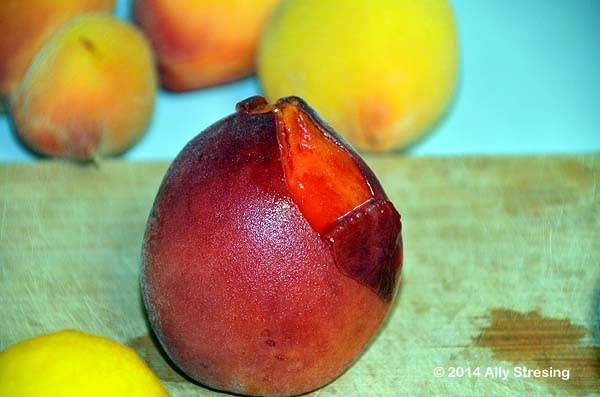
While the onions and garlic were cooking, I started peeling and chopping the tomatoes. Frozen tomatoes shed their skins with only the slightest prompting. Just let them defrost a bit and the skins slip right off like magic.


When frozen, the consistency of the tomato is more like a ripe apple. I just cut out the core, pushed back the skins, and chopped the tomato into pieces. It's so easy and it doesn't make a big, juicy mess, because all the juice is frozen.


I tossed the chopped tomatoes into the pot with the onions and garlic and added all of the remaining ingredients except for the heavy whipping cream. Then, I cooked the mixture over medium heat until hot.


I couldn't find my emulsion blender, which would be perfect for this job, so I improvised and processed the soup using my Nutribullet. When the soup was pureed to the consistency I wanted, I added the heavy whipping cream as a final step.


Garnished with just a sprinkling of dried basil, this soup was like sunshine on a cloudy day.


And, the best part... Yummy leftovers for tomorrow!


Thursday, October 2, 2014

That's Intense!

Back in May 2014, I took a vegetable specialist class out at A&M for the Travis County Master Gardeners. I was exposed to some interesting concepts during the class, but none interested me as much as the idea of biointensive planting.

The basic premise of biointensive gardening is that if you prescribe to certain gardening practices you can produce more food on a smaller piece of land using less water and less fertilizer than traditionally produced food. Wow! What a concept! Who wouldn't want to do that?

One of the keys to being successful with biointensive planting is loose, well-aerated soil. Double digging is recommended to get the soil loose to a depth of 24 inches. I'd need a crew with pick axes to dig down 2 feet, so that's not going to happen anytime soon. 

Loose soil is a good goal to work toward, so I bought a new toy to help. It's a Stihl Yard Boss Cultivator. I'm still learning how to use it effectively, but I'm pretty excited to have a tool to make bed preparation easier. It's light weight and easy start, so it's perfect for me to use on my own.


To complete my vegetable specialist certification, I decided to work on a biointensive planting project of my own. My plan is to grow my own seedlings of broccoli and cabbage and see what happens when the plants are grown at different spacing intervals.

Each set of plants will be grown in a 4' X 12' planting bed with similar water, fertilizer, and sunlight. I will weigh the resulting produce and compare the output of each bed. Here's the spacing I have planned.

Broccoli
Bed 1 - 12 plants
Bed 2 - 24 plants
Bed 3 - 48 plants


Cabbage
Bed 4 - 12 plants
Bed 5 - 24 plants
Bed 6 - 48 plants


Yikes! That's a total of 84 broccoli plants and 84 cabbage plants. I've never grown broccoli or cabbage from seed, but this year I think I will have to give it a try to save money.  

I was initially concerned that I might not even be able to get the seeds to germinate, but that concern turned out to be unfounded. The seeds seemed to germinate without any problem even though my house is 78 degrees in the summer and temperatures under the grow lights can reach 85. 


Since I was taking the time to grow my own broccoli and cabbage seedlings, I added kale, kohlrabi, and cauliflower into the mix. Eventually, I had 15 flats of seedlings and the overflow had to sit on a table in front of a sunny window. All the seedlings got regular field trips outsides, so I just started rotating seedlings from the table back to the light rack on watering day.


Prepping the garden space turned out to be more of a job than I bargained for. After the summer garden and the weeds were cleared away, I meticulously measured out each bed with stakes and flags. Each bed was cultivated and raked to a smooth finish. One down, five to go.


The Lady Bug 8-2-4 is my fertilizer of choice for this project. Each bed is 48 square feet, so I'll be using 1.5 cups of fertilizer broadcast over the entire bed.


Another key to biointensive planting is soil fertility. The soil should be amended generously with compost, which will feed the micro organisms and facilitate water retention. Each bed will be top dressed with a layer of our beautiful, homemade compost.


Finally, it was planting day! The broccoli was ready first, so 12 plants went into the ground. Giving 12 plants so much space seemed somehow sinful, but it's all in the name of science.


The group of 24 broccoli plants was installed next. The spacing seemed a tad tight, but I think the plants will do okay.


This garden was newly created just this past spring, so each bed needed re-bar posts and hoops to support the shade cloth. Shade cloth of some sort is a must for planting cool season veggies in Texas in September. It's still super hot out there and veggie transplants like these would bake under the power of the death star which is still at high power.


Before I continued on with my planting, I decided I better pause to install the irrigation. Thankfully, my hubby came to the rescue and gave me a hand. I'm using 1-10 gallon adjustable emitters in my original garden, but I decided to try out 1/4 inch soaker hose in the new garden. The soaker hose installation doesn't require individual emitters and I'm hoping it will be simpler to install and easier to maintain.


The basic framework uses 1/2 inch plastic tubing with the same tees, elbows and end caps we're used to dealing with.


The big difference is that each bed will get four soaker lines using 1/4 inch tubing.


The 1/4 inch soaker hose is easy enough for me to install. I just punched a hole in the 1/2 inch tubing with this little device.


I cut the soaker hose to length and inserted a connector into one end and a plug into the other end. The connector end snapped right into the little hole I punched. Easy peasy.


Finally, it's time to plant the third broccoli bed with 48 plants. Oh my gosh! That's intense planting! Don't try this at home kids! Stay tuned for updates. I'll let you know how it goes.


Thursday, August 28, 2014

Everything is Just Peachy

A tree ripened peach is a lovely thing to behold. It doesn't have to be perfect and look like waxed fruit to be good. It can have some blemishes and imperfections. None of that matters, because what it looks like will be forgotten with the first luscious bite!


Even better than a single peach ripening is a tree full of juicy, homegrown peaches all ripening in the warm spring sunshine.


In February 2013, we planted a home orchard with 6 fruit trees; two peaches, Junegold and La Feliciana; two apples, Ein Shemer and Anna; and two plums, Santa Rosa and Methley. We started with good sized trees in 5 gallon containers, but I think the bunny manure that we used to mulch the area is responsible for the fast rate of growth and our ultimate success.


In late winter 2014, we had an unexpected late freeze, which ruined our chances for a crop of apples and plums. The peaches lost a few blossoms, but by May 2014 the trees were covered in fruit. The heavy foliage kept most of the fruit well hidden. The trees stayed safe from predators until very late in the harvest when most of the peaches were off the trees.


Branches weighted down with peaches nearly touching the ground made me nervous that we would attract the attention of area wildlife. I checked the trees several times a day picking up any fruit drop that might start to rot and smell. I held my breath for almost 2 weeks fretting and waiting for a nighttime raccoon raid which never came.


We felt incredibly blessed with our first successful peach crop. We harvested 204 peaches in all not including spoilage fruits which went to the compost or the chickens.


I sold some of the best peaches at the farmer's market, but that still left a lot of beautiful peaches for home preservation.


When peaches are ripe, there's no time to waste. I kept the peaches in single layers on trays lined and covered with cotton flour sack clothes. I checked them daily and when the aroma and ripeness was at it's peak, I began to process them for the freezer.

The easiest way to slip off the skins is to slide the peaches into a pot of boiling for about a minute. I cut a small 'X' into the bottom of each fruit to assist with peeling.


Look at how nice and easy the skin peels off. Beautiful!


I boiled and soaked peaches in ice water, plus drained and peeled them seemingly simultaneously. Processing peaches is back crunching work and I can see why people like to put up harvests communally. An assembly line style processing methodology would be way more efficient than my haphazard method. I processed as much as my back could stand and saved the rest for the next day and the day after until they were all processed.


I cut up enough peaches to fill two sauce pans each time I processed.


I eventually developed my own rhythm for separating the peach slices from the pit. One thing I grew to appreciate was the important significance of cling vs freestone peaches. June Gold is a cling peach which was more difficult to process than the La Feliciana which is a semi-cling.


I froze some of the peaches in their own juice using citric acid as a preservative, but most of the peaches I converted to cobbler filling using my favorite recipe with plenty of brown sugar and cinnamon.


During peach season everyone ate well. The chickens got their share of peaches and there were plenty of cobblers, crisps and crumbles for the humans.


Even the compost pile ate well. 


Peach season is the best! I can't wait to see what next year brings!

Monday, July 21, 2014

Traveling the Paths of Portland

During my recent visit to Portland, Oregon, I traveled some very amazing paths. I was in Portland for the annual Garden Blogger's Fling. The Fling coordinators kept us busy with 17 stops at various public and private gardens as well as nurseries and a local book publisher.

One of our first stops was to the Lan Su Chinese Garden, where I saw some of the most magnificent paths my feet have ever tread upon.


I overheard a docent saying the garden and surrounding structures are representative of how wealthy Chinese lived in the 16th century. I can imagine the silk slippers of women slowly gliding along this path and over the bridge.


This path must have been for the kiddos. Did Chinese youngsters play hopscotch? 


The paths at the Portland Japanese Garden led to places of incredible beauty and serenity.


As much as I loved the Japanese Garden, the paths that led to the International Rose Test Garden really called to me. This place smelled wonderful!


Along the way, some paths spoke of gardening friendships like the paths that connected the neighboring gardens of Joanne Fuller and Linda Ernst.


Sometimes paths can be tricky, but when in doubt where to begin, it's always best to start at the beginning. I learned that from watching the Wizard of Oz and I think it's pretty sound advice.


Paths that give me paws are my favorite paths. The kangaroo paws at the John Kuzma Garden made me stop and take notice. I've tried to grow these several times over the years without success and here they were looking like they were growing in their native habitat. 


The paths at the Chickadee Gardens performed double duty as edging for the garden beds. The light grey blocks are very striking next to the dark stones and foliage of the rock garden. 


Danger Garden used wide paths and interconnected patios to display dozens and dozens of potted cactus and succulents. Be careful. Some of those cactus may bite.


You can't go wrong starting a path with a magnificent mosaic tile landing like this one at Floramagoria.


Fancy is nice, but a simple country path also has it's charms.

Floramagoria Side Veggie Garden
I especially like paths which lead to things that taste or smell yummy.

McMenamins Kennedy School Vegetable Garden

Lavender Field at Westwind Farm Studio
As a garden photographer, I have a growing appreciation for paths that provide an opportunity for that perfect shot.

Fellow Flinger at Rhone Street Garden

Old Germantown Garden
I'm at that age where the best paths offer comfy seating. That's one of the things I loved about the gardens at Bella Madrona. Besides being full of all sorts of interesting garden junk, there was a chair around every corner.


The paths of Bella Madrona beckoned to me and my fling roomie, Laura, from the moment we arrived.


The inhabitant path posers paused while we snapped several pics. I think they've had their picture take before.


Bella Madrona had some of the most interesting paths within their enormous 5 acre garden.


These moss covered steps have had 34 years to develop their patina at Bella Madrona.


These magical arches make the woodlands feel enchanted. I bet fairies live here.


I better stay on the path or I might become mired in the marsh like this donkey who's lost his wagon.


I hope you will agree that the best paths are the ones that lead us home. If you're lucky, you have a wet-nosed pup eagerly waiting at the door like this one at the home of JJ De Sousa. JJ owns a store in Portland called Digs Inside and Out. If you're ever in the area, I hear she has wonderful pieces for the home and garden.


Thanks for traveling along with me. I hope this summer leads you down some interesting paths as well.