Wednesday, May 23, 2012

It's Wonderful


The ‘Wonderful’ variety of pomegranate tree has large orange-red flowers and deliciously tangy purple-red fruit.  Well, at least that’s what the label says.  I’ve yet to see a flower or fruit, so at this point I’m going on faith.

I have wanted to try growing a pomegranate tree for awhile.  I was just waiting for the right opportunity to present itself.  I needed to find a spot in full sun with good drainage and I just couldn’t decide on the perfect location until recently.

No one likes to see a beautiful, stately oak tree die before it’s time, but the recent removal of a dead tree presented me with a pomegranate planting opportunity.  

To get my pomegranate tree off to the best start possible, I’m going to plant it using the recommended planting instructions provided on the grower’s label.  The first step is to dig a hole three times the diameter of the root ball.


The instructions recommend setting the top of the root ball two inches above grade, so be careful not to dig the hole too deep.  Planting a tree too deeply is probably the biggest planting mistake that people make when planting a new tree.

I like to mix compost into the native soil.  My soil ranges from sand to clay, but this site contains a sandy loam that is more on the sandy side.  The compost will help the soil retain moisture, which the pomegranate will appreciate. 

Fill in the hole and create an ample basin around the tree.  A large water basin will ensure the water soaks down into the root ball where it is needed for the tree to get established.

 If I take care of this tree, in a couple of years, I’ll have tasty pomegranates.  Isn’t that wonderful?


Sunday, May 20, 2012

The Winner is... Kennebec

Edging out the La Soda Red by a spud, Kennebec is the production and quality winner in my garden this year.


Back in late January, I prepared equal amounts of red and white seed potatoes and planted them in two - 3 foot by 12 foot garden beds.  I normally target my planting date for President's Day, but this year's warm winter encouraged me to try planting early.

Planting early has it's risks.  Freezing temperatures can zap tender seedlings, but I was prepared with row covers in the event that any freezes swooped in.  Nothing of the sort happened and planting early payed off with an early harvest and large potatoes.
Prepared Seed Potatoes
Seed Potatoes Planted in a Trench
The plants in both beds were "dirted" multiple times and received a similar amounts of water and fertilizer.  "Dirting" means to pile dirt around the stem of the potatoes where the potatoes are produced.  

Since potatoes are formed close to the stem and the soil surface, multiple "dirtings" will produce the most potatoes.  I mound the dirt as high as it will go and add a layer of hay to help hold the dirt and moisture in place.


At the end of March, the potatoes bloomed.  The blooms and plants were soon chewed up pretty badly by hungry caterpillars, but they were pretty while they lasted.

By mid-May the plants are falling over and it's time to harvest.  At this point, the potato plants are stressed by the heat and have been munched on by a variety of insect pests.  They look pretty ratty, but that's okay.  The real magic is taking place underground and I'm hopeful as always that this will be the best crop ever.
Plants Ready for Harvest

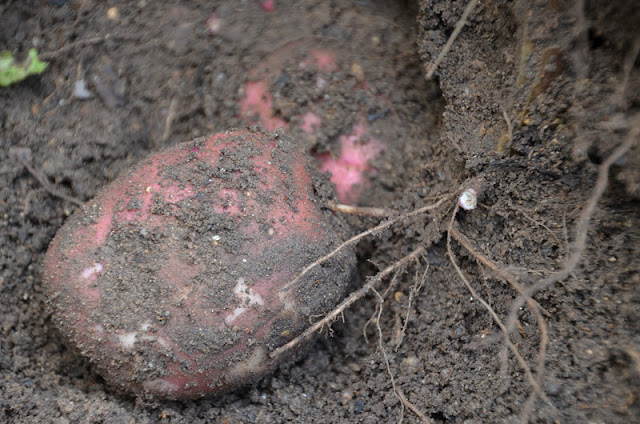
When it's time to harvest, my husband and I work together.  We pull up the plants and clear away the foliage.  The potato tubers are attached to the mother plant via a root-like stolon.  I've cleared away a side view for a closer look in the photos below.  Notice how the roots have little hairs, but the stolons attaching to the potatoes are smooth.
Clearing Away Foliage
Stem with Tubers
Tuber Close-up
Potato Stem with Tubers and Stolens
We use a fork to loosen the soil and start hunting through the dirt for potatoes.  It's hard work and when we're done the raised beds are a mess.  The fork may pierce a potato or two despite our best efforts not to.  The potatoes heal over the pierced areas, but it's always best to use damaged potatoes first, since they will have a shortened shelf life. 

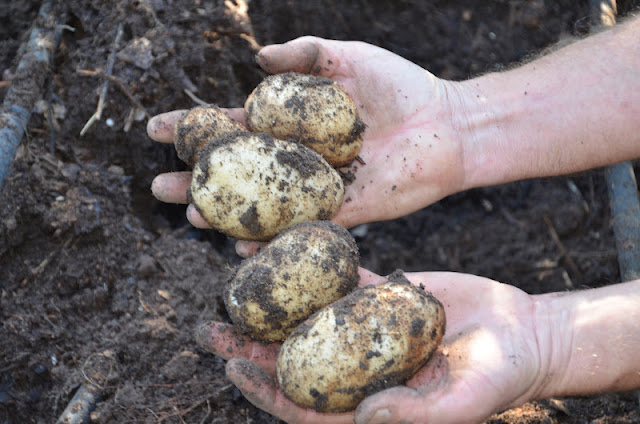
Look at what we have to show for all of our hard work!  Must be close to 70 pounds of potatoes.  Stored in paper bags and kept in a cool dark place, these beauties will keep for months.  This is good because it will take a while to eat this many potatoes.  Even with giving some away to family and friends, that's a lot of tater salad.

Thursday, May 10, 2012

Pocketful of Sunshine

Growing daisies is like having your own pocketful of sunshine.

Even on a rainy day, somehow this bedraggled pair of Gerbera daisies remind me of a well-worn teddy bear or a flop-eared pup.

There are many daisies and daisy cousins that we can grow in Central Texas with very little effort.  Here are a few blooming in my garden right now.


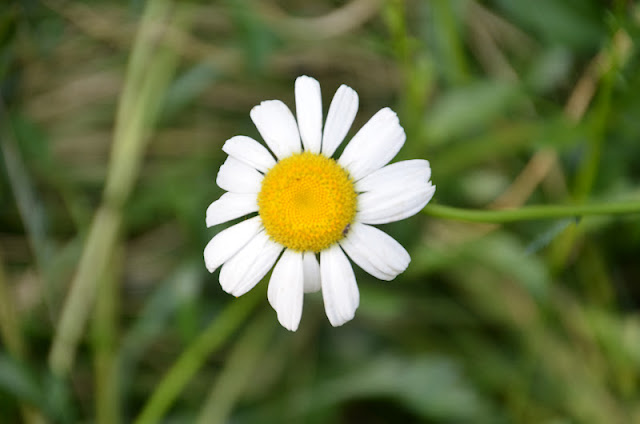
The Oxeye daisy (Leucanthemum vulgare) is considered a weedy, invasive pest in some U.S. States, but in my garden it's a reliable, drought tolerant perennial.  It reseeds a little, but the volunteers are easy to weed out or save for transplanting.  The plants form a shrubby little mound about a foot tall and the bright, sunny flowers are borne on long stems that reach for the sun.


The Shasta daisy (Chrysanthemum maximum) was introduced by Luther Burbank in the early 1900's.  He started with the Oxeye daisy and cross-pollinated it with other daisies before finally coming up with the perfect daisy.  The numerous white petals and perfect little yellow button centers form the quintessential daisy on precisely upright stems.  Luther knew his stuff.


The Blackfoot daisy (Melampodium leucanthum) is a tough native Texas perennial that doesn't like to be babied.  The daisies might be tiny, but they are tenacious.  Grow the Blackfoot daisy in rock gardens or on edges of hot sunny borders.


The Copper Canyon daisy (Tegetes lemmonii) is a perennial shrub that blooms in the spring and the fall in response to the shortened day length.  This plant can get tall and rangy, so give it some space to spread out.  


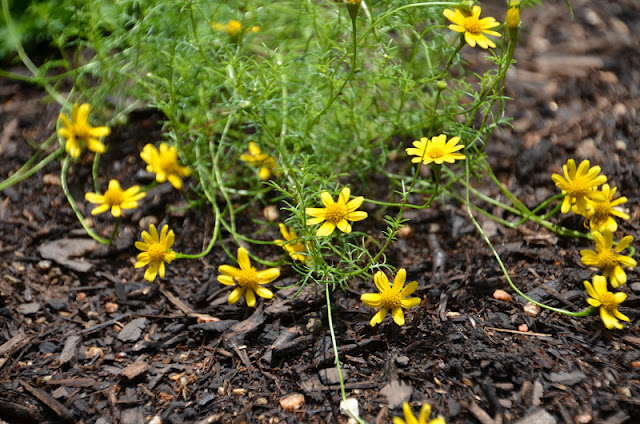
Dahlberg daisy (Thymophylla tenuiloba) is a new addition to my garden.  I'm just getting to know this plant, which was recently given to me by Jenny at Rock Rose.  It's diminutive, yellow daisies and fern-like, airy foliage make it an excellent addition to the front of my mixed border.


Four-Nerve daisy (Tetraneuris scaposa) has been in my garden for as long as I can remember.  This is one tough little plant of about 4-6 inches tall.  The little yellow daisies are held up on stems that are almost invisible, giving the flowers the appearance of floating just above the foliage.


The Purple Coneflower (Echinacea purpurea) is a daisy relative that I love.  I haven't always had the best success with this plant, but this year I was rewarded with Coneflower seedling volunteers that I am nursing along until the day I can transplant them to a new spot.


Still flush with my Coneflower success, I recently jumped at the opportunity to buy this unusual orange variety.  I planted it in a sunny bed with a back drop of Bamboo Muhly and common Artemisia just in time to take advantage of the recent rainfall.  


Would you like a pocketful of sunshine on a rainy day?  Plant some daisies.  They're guaranteed to make you smile.