
The basic premise of biointensive gardening is that if you prescribe to certain gardening practices you can produce more food on a smaller piece of land using less water and less fertilizer than traditionally produced food. Wow! What a concept! Who wouldn't want to do that?
One of the keys to being successful with biointensive planting is loose, well-aerated soil. Double digging is recommended to get the soil loose to a depth of 24 inches. I'd need a crew with pick axes to dig down 2 feet, so that's not going to happen anytime soon.
Loose soil is a good goal to work toward, so I bought a new toy to help. It's a Stihl Yard Boss Cultivator. I'm still learning how to use it effectively, but I'm pretty excited to have a tool to make bed preparation easier. It's light weight and easy start, so it's perfect for me to use on my own.

To complete my vegetable specialist certification, I decided to work on a biointensive planting project of my own. My plan is to grow my own seedlings of broccoli and cabbage and see what happens when the plants are grown at different spacing intervals.
Each set of plants will be grown in a 4' X 12' planting bed with similar water, fertilizer, and sunlight. I will weigh the resulting produce and compare the output of each bed. Here's the spacing I have planned.
Broccoli
Bed 1 - 12 plants
Bed 2 - 24 plants
Bed 3 - 48 plants

Cabbage
Bed 4 - 12 plants
Bed 5 - 24 plants
Bed 6 - 48 plants

I was initially concerned that I might not even be able to get the seeds to germinate, but that concern turned out to be unfounded. The seeds seemed to germinate without any problem even though my house is 78 degrees in the summer and temperatures under the grow lights can reach 85.


Since I was taking the time to grow my own broccoli and cabbage seedlings, I added kale, kohlrabi, and cauliflower into the mix. Eventually, I had 15 flats of seedlings and the overflow had to sit on a table in front of a sunny window. All the seedlings got regular field trips outsides, so I just started rotating seedlings from the table back to the light rack on watering day.

Prepping the garden space turned out to be more of a job than I bargained for. After the summer garden and the weeds were cleared away, I meticulously measured out each bed with stakes and flags. Each bed was cultivated and raked to a smooth finish. One down, five to go.

The Lady Bug 8-2-4 is my fertilizer of choice for this project. Each bed is 48 square feet, so I'll be using 1.5 cups of fertilizer broadcast over the entire bed.


Another key to biointensive planting is soil fertility. The soil should be amended generously with compost, which will feed the micro organisms and facilitate water retention. Each bed will be top dressed with a layer of our beautiful, homemade compost.

Finally, it was planting day! The broccoli was ready first, so 12 plants went into the ground. Giving 12 plants so much space seemed somehow sinful, but it's all in the name of science.


The group of 24 broccoli plants was installed next. The spacing seemed a tad tight, but I think the plants will do okay.

This garden was newly created just this past spring, so each bed needed re-bar posts and hoops to support the shade cloth. Shade cloth of some sort is a must for planting cool season veggies in Texas in September. It's still super hot out there and veggie transplants like these would bake under the power of the death star which is still at high power.


Before I continued on with my planting, I decided I better pause to install the irrigation. Thankfully, my hubby came to the rescue and gave me a hand. I'm using 1-10 gallon adjustable emitters in my original garden, but I decided to try out 1/4 inch soaker hose in the new garden. The soaker hose installation doesn't require individual emitters and I'm hoping it will be simpler to install and easier to maintain.

The basic framework uses 1/2 inch plastic tubing with the same tees, elbows and end caps we're used to dealing with.

The big difference is that each bed will get four soaker lines using 1/4 inch tubing.

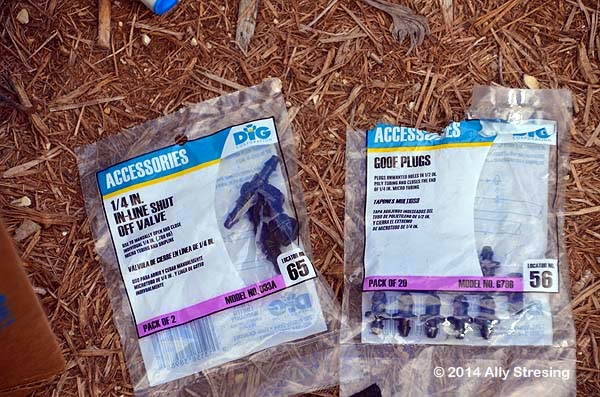
The 1/4 inch soaker hose is easy enough for me to install. I just punched a hole in the 1/2 inch tubing with this little device.

I cut the soaker hose to length and inserted a connector into one end and a plug into the other end. The connector end snapped right into the little hole I punched. Easy peasy.

Finally, it's time to plant the third broccoli bed with 48 plants. Oh my gosh! That's intense planting! Don't try this at home kids! Stay tuned for updates. I'll let you know how it goes.

Oh, what a captivating post. I started some broccoli and cabbage but mine were not engineered in a sophisticated way, just a flat with some seeds in the South GA sun.
ReplyDeleteI'm still working on the cabbage patch, Centipede grass crept in while I was growing tomatoes there. My plan is still standard spacing. By the time I finally plant, I think the weather will be just right for them. I'll follow yours with great interest.
I tried to leave some of my seedlings outside, but the grasshoppers were eating the poor little things to the nub. Darn hoppers!
DeleteI am really impressed with your set up. No wonder you have such success.
ReplyDeleteThanks Jenny. It's taken some time to get here, but 2 grow racks and 2 gardens allows me to grow extra for the market. I'm hoping to be able to rotate crops better with the extra space too.
DeleteCan't wait to see how this turns out. I try to stick with the spacing recommended, but it often feels like I should have way more plants in a bed.
ReplyDeleteI think the intensive planting will work for the broccoli, but I have my doubts about the cabbage. Cabbage plants really like to spread out , so we'll see what happens.
DeleteWow! I am so impressed with your endeavour. And grateful for the details on irrigation, which I will be attempting in the coming year. Looking forward to seeing the comparative results between beds!
ReplyDeleteI'm not sure how t feel about the soaker hose yet. I have 6 more beds to do, so I'm thinking of trying out the 1/4 drip line with the pre punched holes. If I do that, I'll blog about all the different drip products I've tried so far.
DeleteWow. Great information. Will be waiting for updates. Will refer back for
ReplyDeleteirrigation info because that's what i want to work on next. Have one question. Where did you get the shade cloth and what kind is it? Thanks in advance.
I bought the shade cloth at Home Depot. It comes in 25 and 50 foot lengths. It's a little pricey, but it lasts a long time. When I run out of shade cloth, I use burlap.
DeleteGreat post. And, good information on the irrigation system.
ReplyDeleteThanks Linda. With all the comments about the irrigation, I'm thinking I need to do another detailed irrigation post. I know from experience that all the parts and pieces can be a little confusing. It's a little like playing with Legos.
DeleteI clearly need a bigger yard! SO jealous of your setup!
ReplyDeleteHaving 2 acres is very nice, but it is a lot of work. The weeds quickly try to reclaim any space I claim as my own. After 20 years of mulch my old garden gets minimal weeds, but the new garden is a weed magnet.
DeleteNice post! I'm really interested in how it all works out. Do you sell seedlings?
ReplyDeleteCindy S
Singhal Industries Pvt Ltd is a leading Greenhouse Plastic Manufacturer In Gujarat, offering high-quality and durable products that cater to diverse agricultural needs. Their greenhouse plastics are designed to provide excellent UV protection, maintain optimal temperature, and ensure a robust environment for crops. The material is lightweight yet sturdy, ensuring easy installation and long-lasting performance. With a focus on innovation and customer satisfaction, Singhal Industries has become a trusted name among farmers and growers. Their commitment to sustainability and quality is truly commendable. Highly recommended for anyone looking to enhance their agricultural productivity with reliable and efficient greenhouse solutions!
ReplyDelete